| description | Easily retargetable and hackable interactive disassembler with IDAPython-compatible plugin API |
| repository URL | https://github.com/pfalcon/ScratchABit.git |
| owner | pfalcon@users.sourceforge.net |
| last change | Wed, 25 Nov 2020 22:02:52 +0000 (26 01:02 +0300) |
| last refresh | Fri, 3 May 2024 20:25:00 +0000 (3 22:25 +0200) |
| mirror URL | git://repo.or.cz/ScratchABit.git |
| https://repo.or.cz/ScratchABit.git | |
| ssh://git@repo.or.cz/ScratchABit.git | |
| bundle info | ScratchABit.git downloadable bundles |
| content tags |
ScratchABit
ScratchABit is an interactive incremental disassembler with data/control flow analysis capabilities. ScratchABit is dedicated to the efforts of the OpenSource reverse engineering community (reverse engineering to produce OpenSource drivers/firmware for hardware not properly supported by vendors, for hardware and software interoperability, for security research).
ScratchABit supports well-known in the community IDAPython API to write disassembly/extension modules.
ScratchABit is a work in progress, features are added on as needed basis, contributions are welcome.
ScratchABit is released under the terms of GNU General Public License v3 (GPLv3).
Requirements/manifesto
Should not be written in an obfuscated language. These include languages which are too low-level, which allow to access non-initialized variables, which don't differentiate between variables and functions/procedures, which start array indexes from arbitrary numbers, etc., etc. ScratchABit is written in Python (modern version, Python3) for your pleasure and sanity.
User interface framework should allow user interaction of the needed level, not add dependencies, bloat, issues, and incompatibilities between framework's versions. ScratchABit currently uses simple full-screen text user interface, using ANSI/VT100 terminal escape sequences (yes, even curses library was deemed too bloat a dependency to force upon users).
Should leverage easy to use text formats to store "database", to facilitate easy reuse and tool writing, and storage in version control systems.
Installation
To use ScratchABit, you need Python3 installed (tested with Python 3.3 thru 3.7) and VT100 (minimum) or XTerm (recommended) terminal or terminal emulator (any Unix system should be compliant, like Linux/BSD/etc., see FAQ below for more).
Clone the code using:
git clone --recursive https://github.com/pfalcon/ScratchABit
If you cloned code without --recursive, run git submodule update --init
in the ScratchABit directory.
ScratchABit now ships with Capstone Engine based CPU plugin(s), which allow access to a number of CPU architectures. To use it, recent Python bindings module for Capstone should be installed (in the preference to packages shipped by OS distributions, which are often outdated). The easiest way to install it is into the Python user packages directory:
pip3 install --no-cache-dir --user capstone
An alternative is to install it to a Python virtual environment within the ScratchABit directory:
python3 -m venv .venv
source .venv/bin/activate
pip3 install --no-cache-dir capstone
Whenever you open a new terminal session to work with ScratchABit,
run source .venv/bin/activate command again to activate the virtual
environment.
If nothing of the above works, you can try to install the capstone package system-wide (not recommended):
sudo pip3 install --system capstone
Quick start
If you want to disassemble a file in self-describing executable format
(like ELF), just pass it as an argument to ScratchABit.py. The repository
includes a number of example-*.elf files for various architectures for
a quick start. For example, to try x86 32bit version:
python3 ScratchABit.py example-x86_32.elf
Alternatively, if you want to disassemble a raw binary file, you need to create a .def (definition) file, to specify what memory areas are defined for the code, at which address to load binary file, etc. (Note: a .def file may be useful for .elf and similar files too.) The repository includes a simple x86_64 raw binary code, and the corresponding example-x86_64.def file (look inside for description of available options):
python3 ScratchABit.py example-x86_64.def
Press F9 to access menus (mouse works too in XTerm-compatible terminals). Press F1 to get help about key bindings (most actions are also accessible via menu). The workflow of ScratchABit is similar to other interactive dissamblers (some previous experience or background reading may be helpful).
Using Plugins
IDAPython processor plugins can be loaded from anywhere on the Python
module path. Alternatively, you can symlink/copy the plugin .py file(s)
into the plugins/cpu/ subdirectory.
After the plugin is made available, create a new definition file based
on example-x86_64.def that sets the plugin module
name (without .py extenstion) in the cpu xxx line.
For a very simple example that uses an external plugin, see this esp8266.def file that works with the xtensa.py plugin from the ida-xtensa2 repository.
TODO/Things to decide
Currently uses multiple files for "database", each storing particular type of information. Switch to a single YAML file instead?Add color (low priority, (unbloated!) patches welcome).Few important UI commands to implement yet for comfortable work.( All the most important commands should be there, other functionality is expected to be implemented using plugins).Offer to save DB on quit if modified.- Git integration for DB saving.
Improve robustness (add exception handler at the main loop level, don't abort the application, show to user/log and continue).- Try to deal with code flow inconsistencies (e.g. within an instruction - low priority for intended usage) and data access inconsistencies (e.g. accessing individual bytes of previosly detected word - higher priority). (Improved in 1.4.)
- See how to support other types of IDAPython plugins besides just processor modules.
- Parse and use debugging information (e.g. DWARF) present in ELF (etc.) files.
FAQ
Q: What processors/architectures are supported?
A: ScratchABit doesn't support any processor architectures on its own, it is fully retargettable using IDAPython API plugins. Many plugins are available, writing a new plugin is easy. To let users test-drive ScratchABit, a simple x86 processor plugin is included in the distribution, using Pymsasid disassembler under the hood.
From version 2.0, Capstone plugin is also included, allowing access to a number of architectures, including x86, ARM, MIPS, PowerPC, SPARC, etc. (architecture support is enabled gradually based on user testing).
You can read about the plugins shipped together with ScratchABit in
the README for plugins/cpu/ dir.
Q: Debugger?
A: ScratchABit is dedicated to static analysis and easy support for new CPU architectures (just code up an new CPU plugin in Python - you can get initial results in few hours). Dynamic analysis wasn't conceived to be a core feature and there're no immediate plans to implement it. Patches are welcome though.
Q: Decompiler?
A: There is a related project, called ScratchABlock for deep program analysis, transformation and decompilation. It's expected that as ScratchABlock matures, some of its functionality will be available within ScratchABit (perhaps via plugins).
Q: I'm not on Linux, how can I run ScratchABit?
A: Install Linux in an emulator/VM on your system and rejoice.
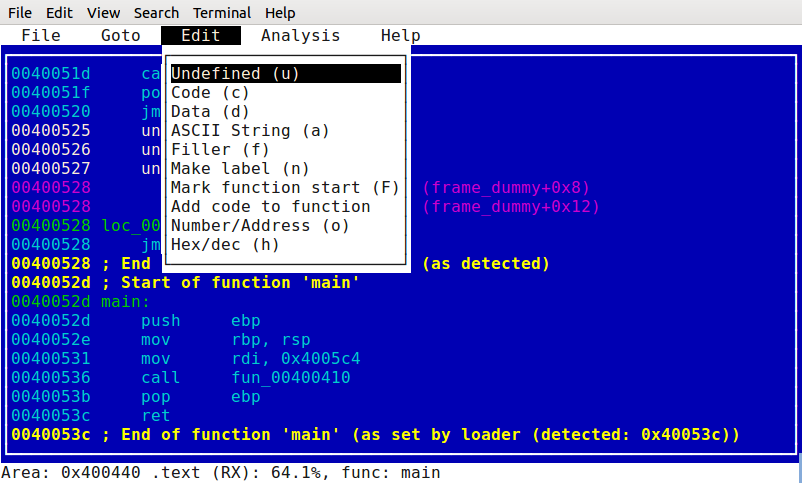
Q: Mandatory screenshot?
A: Sure:
| 6 years ago | v2.0 | commitlog | ||
| 6 years ago | v1.8 | commitlog | ||
| 7 years ago | v1.7 | commitlog | ||
| 7 years ago | v1.6 | commitlog | ||
| 7 years ago | v1.5 | commitlog | ||
| 7 years ago | v1.4 | commitlog | ||
| 7 years ago | v1.3 | commitlog | ||
| 7 years ago | v1.2 | commitlog | ||
| 7 years ago | v1.1 | commitlog | ||
| 8 years ago | v1.0 | commitlog | ||
| 8 years ago | v0.9.1 | commitlog | ||
| 8 years ago | v0.9 | commitlog | ||
| 8 years ago | v0.8.9 | commitlog | ||
| 8 years ago | v0.8 | commitlog | ||
| 8 years ago | v0.7 | commitlog | ||
| 8 years ago | v0.6 | commitlog | ||
| ... | ||||
| 3 years ago | master | logtree |